In which the author tells you how to run your life -- or at least how to make the most of the fun parts of it.

For instance, inside these pages you will learn how to weather a mortar attack in good spirits; how to avoid booking yourself on the Internet into a bed and breakfast full of twee quilts and dusty tchotkes; and how to plan a dinner party that will stun your guests with deliciousness and style and not destroy your will to live with the amount of work you have to do to pull it off.

These are things I know firsthand, and things people who know me often ask me about (though I usually just book them into bed and breakfasts myself -- identifying ruffled death traps is an acquired skill). I am almost always right about everything (food, style and travel-related, anyway, and often many other things) and if everyone would just do as I say, dinner would taste better, cupcakes would not be dry, your parties would be more fun (for you), and mortar attacks... well, they always suck. I can't do anything about them.


*except laundry. I can't manage my own laundry, much less yours.


Search This Blog

Monday, August 29, 2011

How to Make the Most of Every Season


I have 2 related problems.


One, and this may be because I am a lefty -- we are visual organizers, apparently -- I can't remember to do a thing unless it's written right there in front of me.


Two, I devolve into panic as each season ends because I havent done all the things I intended to do and life is slipping away inexorably and soon I will be dead or dying and wondering why I didn't fit in one last swim at Beaver Dam before the weather turned and condo developers took over the site?


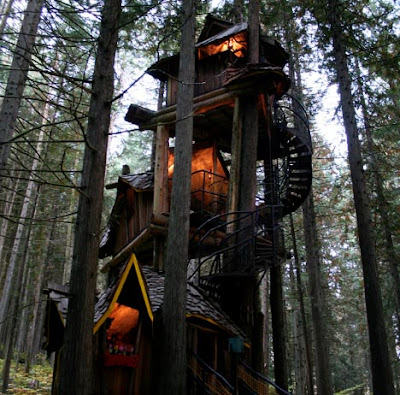
So when I went to my friend Heidi's house (a Victorian mansion in Oak Park, Illinois) I was delighted to see a piece of butcher paper tacked to the kitchen wall with all these very summer specific activities listed on it. She explained that at the onset of each season the family makes a list of all the things they want to do (and have to do: ie, read summer school books) before the next season begins. Whenever the kids are at a loss ("I'm bored!") or the family is wondering what to do with their weekend, the List is right there, ready and wiling to tell them.


So let's all do that! Tack up your butcher paper, get your pens out, and start writing.

Fall is fast approaching.


Here is my list, which I will shortly transfer to paper. (share yours in the comment section so I can crib from your list)


Go apple picking

make apple pies

carmelize the last of summer cherry tomatoes and freeze for sauce

slice and freeze peaches for pies

hike old rag mountain

help out at a winegrape harvest

clean my gutters

sweep my leaves

make carrot potato soup with dill and cheddar

make a chocolate cake and invite friends over on a saturcday afternoon for a walk and cake

go to the museums (they are free in DC, its awesome)

walk to brunch at the Tabard Inn

hike Old Rag mountain

go to the Brimfield flea market

make fires in the fireplace

make chili

paint my dining room chairs

knit a scarf for my niece

have an apple fritter party

make donuts

make cheese fondue

go to a corn maze (the last time I totally freaked out and ran for my life and sprained my ankle)

go to a pumpkin patch and pick a pumpkin

make one of them martha stewarty gorgeous pumpkins

do something scary at my house for halloween (or just hide inside with the lights out)

go to trapeze school

ride a horse out at Desert Rose winery

buy/make xmas presents in advance

deep clean every room

learn arabic (I keep saying that)

plant baby lettuce

spend the day in Baltimore

eat crabs before the weather turns

make popcorn

Wednesday, August 17, 2011

A new favorite blog. OK blogs.

dornob.com


click on architecture. the rest of it is a little too inaccessible for me. But the tree houses! the prefabs! oh my word. observe:


and if you haven't discovered it, check out manhattan-nest.com.


The boy is a CHILD (a sophomore maybe at NYU) but is both brilliant and hilarious with impeccable taste and none of the terrible snobbiness that afflicts many design bloggers. He just is, and I love.


Sunday, August 14, 2011

How to Master Vinaigrette


People.


Listen.


Do not invite me over and serve an undressed salad and give me a choice of bottled dressings.


Bottled dressing is hideous. Overly acidic, full of weird emulsifiers (truly: do this. Pour a little bit of bottled dressing on your spoon. Place contents of spoon in your mouth. Hold it on your tongue. You will feel it first, rather than taste it -- it will feel thick. Then slowly you'll get a hit of acid -- probably citric acid. Then it will feel viscous again and you'll start to get the honey-mustard-oregano-Russian whatever it is you bought it for).


STOP IT.


This is a waste of money and an insult to Ms. Life, not to mention green leaves everywhere.


Your delicious little leaves deserve the utterly minimal effort of a homemade vinaigrette, and they deserve to be dressed ahead of time, lightly. You wouldn't want your host putting you out in front of guests naked, would you? (Maybe you would. I don't know you.)


Nothing worse than tossing your own salad (stop it!). Individual salad bowls do not have the room to do it yourself at the table, so some leaves are covered and others are dry. Totally unacceptable.

If you are a remotely interested cook, and I mean remotely, you probably have everything you need on hand: It's three parts good olive oil to one part acid - vinegar or citrus, or a mix of the two. That's it.


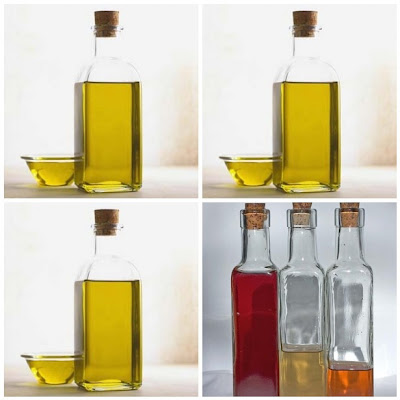
Got it? pour three tablespoons of cold-pressed extra virgin olive oil in a bowl. Add 1 tablespoon acid -- balsamic vinegar is sweet, red wine vinegar less so, cider vinegar works on and on. OR squeeze in a lemon (not the whole thing, just a tablespoon, or maybe a hair less). Whip it together with a fork until its thick and cloudy (this is called emulsifying... the natural way). That's it. You're done. Less time than opening the fridge and plunking that nasty cold bottle on the table.


You can gussy it up with all sorts of stuff -- I usually add a touch of Dijon mustard (not regular mustard). You can grate in citrus zest. The juice of a tomato. A wee bit of honey. A tiny bit of coarse salt. Lime juice (fresh only). You can put in grated ginger and replace a little of the oil with sesame oil (then add in just a splash of soy sauce). Minced garlic. Minced shallots or scallions. But let them all float in a sea of three to one, olive-oil to-acid.


Put this mixture in the bottom of a salad bowl. Not too much -- too much and your salad is limp and wilted and you don't taste any green. Put your cleaned greens on top (I am partial to JUST greens -- a mix of baby lettuces, especially arugula, maybe purslane, snipped herbs -- basil, tarragon, dill -- edible flowers for gorgeousness (try the lavendery basil flowers you snip off your herb garden). Toss gently, scooping up from the bottom. As the leaves touch the bottom of the bowl they will get a nice touch of dressing.


If the salad is too dry, add a bit more, toss gently.


BANISH THE BOTTLE. In this case, it shall be I who thank you.


("You're welcome, Pam!")


Tuesday, August 9, 2011

OK, I know I promised Special Face But I have a Half-Assed Craft to Share: Industrial Swing Arm Lamp

IMPORTANT EARTHQUAKE UPDATE:

MY POORLY MADE NO ADHESIVE AT ALL ITS NOTHING BUT SPIT AND GRAVITY SWING ARM LAMP WAS UNAFFECTED BY THE EARTHQUAKE.

MY LAMP RULZ


Ta Daa!


The Problem: My marvelous bed (handcrafted not by me of 4 industrial pallets from the 1920s with a canvas dropcloth canopy) is under the eaves of my roof. We like to read in bed. Affixing sconces to the limited headboard area not an option... you would smash into them at night. Bedside lamp is on my side and I usually close my book first, so then it would shine in my eyes.


The Solution: In Los Angeles a couple of years ago I absolutely fell in love with these Jean Prouve swing arm lamps. 
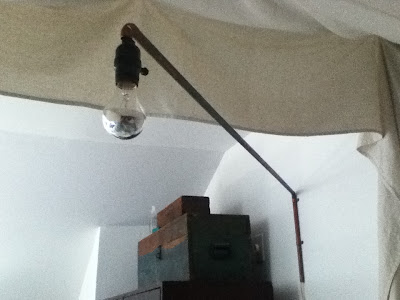
There is an excellent DIY tutorial online to make a reasonable facsimile but I am too lazy for it. It requires a blow torch and bendy tools and steel. Fergit it.


http://onefortythree.com/home/?p=445


I like things easy, like Tonka Toys and Lincoln Logs.


I also like things cheap.
So I hied on over to Fragers Hardware, most fabulous hardware store in the US, and started piecing together copper pipes, elbow joints etc. Then a nice lady found me a lamp kit and I searched and searched and finally found a silver-tipped lightbulb -- necessary so as to avoid blinding.


Here's how you make it!


Purchase:


-One length of copper pipe. You can use the other kind but I think its heavier .. they call it white or electrical pipe. It's silver.


-One pipe cutter. It's like a little ring thing that works like a pasta machine, sort of. You afix it to the pipe where you want to cut it, then turn 1/4 turn, then clamp it down a little harder. Repeat all the way around the pipe a few times until the pipe is cut.


- 2 elbow joints in the appropriate width for your pipe (mine is 1/4 inch I think)


- a pendant lamp kit (no harp)


-2 c-shaped copper things that you screw down to hold the lamp to the wall.


-4 screws


- a drill


-a screwdriver


-a sliver-tipped lightbulb


- all your moxie because you are about to be a light-making bad ass.


Directions:


Simple!


1. Cut your pipe into 2 pieces. One will be the swing arm, one will be the "base." Measure how far you want the lamp to swing (3 feet? 4 feet?) and proceed thusly.


2. Thread your lamp cord through the base piece of pipe, letting the plug swing free like a little bird.


3. Affix one elbow joint to the top end of the base pipe. Pull the cord through.


4. Now screw the swing arm into the other end of the elbow joint. and feed the lamp cord into it. You'll have a floppy L shaped bit of pipe.


5. Continue feeding the lamp cord through the pipe. When it comes out the other end, put on another elbow joint and pull the cord through.


6. Follow the directions for threading your lamp socket. It's easy. But you'll need a screwdriver.


7. Now you'll have a finished lamp socket hanging out of your copper pipe. You're almost there!


8. Decide where you want the lamp to go on the wall. Put the lamp down. Hold up one of the C-shaped thingies on the wall where you want it to be and mark the spots where the screws will go.


9. Drill holes with a bit more narrow than your screw. Hold the lamp in place and place C shaped thingy over the holes. Now screw in srews with your screw driver. This works best if you've found a wall stud. If not, buy anchors for your screws and follwo the direction on the package. It will probably involve a hammer.


10. Repeat with second c-shaped thingy. Lamp should now be firmly affixed to wall. It will rotate on the elbow connected to the base (you'll want to make sure those have a snug fit).


11. Read in bed, and swing that bad lamp outta your way when its time to sleep.


Observe!


lamp in action over bed.


How it attaches to the wall. See? C-shaped thingies.


Total Cost: $30.00


You're welcome.

(yay I'm back!)


(I got the copper to tarnish/go verdigris with a mix of salt and vinegar. didn't take but an hour or so to turn green)